AMD Ryzen ThreadRipper KVM Windows 10 GPU pass-through
AMD Ryzen ThreadRipper KVM Windows 10 GPU pass-through
The AMD Ryzen ThreadRipper CPU is, thanks to the enormous core count, perfect for virtualization. By passing an graphic card to the VM it's possible achieve almost bare metal GPU performance, which is important for gaming or the use of graphical intensive software (like Adobe Photoshop).
In this guide we are going to set up QEMU / libvirt with KVM to power Microsoft Windows 10 with an passed-through AMD Radeon RX 580. Using an AMD ThreadRipper with KVM / QEMU and a passed-through GPU can be a bit tricky tough and there are a lot of performance caveats to look out for.
Host preparation and requirements
I am using an AMD Ryzen ThreadRipper 2970WX with an MSI MEG x399 CREATION motherboard, 64GB of RAM and two graphic cards (AMD Radeon Vega 64 for the Linux host and an passed-through AMD Radeon RX 580 for the Windows 10 virtual machine). Linux distribution is Gentoo, but any recent Linux distribution should just work fine.
You can use KVM GPU pass-through with just one graphic card, but it's quite different to set up (you need to switch on boot) and the host is not available (graphically) meanwhile. Buying a "cheap" second graphics card for the host is probably the easier solution.
ThreadRipper BIOS settings
Make sure AMD-V is enabled by running grep svm /proc/cpuinfo. For the MSI MEG x399 CREATION, you have to enable AMD virtualization, but there is no dedicated setting to enable IOMMU (AMD-Vi). You should enable Windows 10 WHQL Support in the BIOS though, else you can't pass-through the GPU in your first PCI-Express slot (PCIE_1).
Linux Kernel settings
Make sure your kernel supports IOMMU (Input Output Memory Management Unit).
# zgrep IOMMU /proc/config.gz
CONFIG_IOMMU_API=y
CONFIG_IOMMU_SUPPORT=y
CONFIG_IOMMU_IOVA=y
CONFIG_AMD_IOMMU=y
CONFIG_AMD_IOMMU_V2=y
Also check that your Linux Kernel supports KVM.
# zgrep -i kvm /proc/config.gz
CONFIG_KVM_MMIO=y
CONFIG_KVM_ASYNC_PF=y
CONFIG_HAVE_KVM_MSI=y
CONFIG_HAVE_KVM_CPU_RELAX_INTERCEPT=y
CONFIG_KVM_VFIO=y
CONFIG_KVM_GENERIC_DIRTYLOG_READ_PROTECT=y
CONFIG_KVM_COMPAT=y
CONFIG_HAVE_KVM_IRQ_BYPASS=y
CONFIG_KVM=m
CONFIG_KVM_AMD=m
CONFIG_KVM_MMU_AUDIT=y
And last, but not least, check that VFIO and VFIO_PCI is enabled (either as module or inbuilt).
#  zgrep -i vfio /proc/config.gz
CONFIG_KVM_VFIO=y
CONFIG_VFIO=y
CONFIG_VFIO_PCI=y
CONFIG_VFIO_PCI_VGA=y
If one of these settings is not enabled, you may want to rebuilt your kernel.
Boot parameters / Module settings (VFIO)
Next we need to add some boot parameters to our Linux entry.
iommu=pt or amd_iommu=pt enables IOMMU only for pass-through devices and provides better host performance. Revert to
amd_iommu=on, if it's not working for your host.
Grub 2
Modify the grub configuration at /boot/grub/grub.cfg (or the GRUB_CMDLINE_LINUX entry in /etc/default/grub) and add the following options to the kernel parameters:
linux /vmlinuz-linux ... amd_iommu=on iommu=pt pcie_acs_override=downstream vfio_iommu_type1.allow_unsafe_interrupts=1 kvm.ignore_msrs=1 rd.driver.pre=vfio-pcisystemd-boot
Modify the systemd-boot-loader entries file (normally located at /boot/loader/entries/) and extend the options line with the following:
options ... amd_iommu=on iommu=pt pcie_acs_override=downstream vfio_iommu_type1.allow_unsafe_interrupts=1 kvm.ignore_msrs=1 rd.driver.pre=vfio-pciReboot your system and verify IOMMU is activated and that your IOMMU groups are detected (Four in case of the AMD ThreadRipper 2970WX).
# dmesg | grep IOMMU
[    7.572492] AMD-Vi: IOMMU performance counters supported
...
[    7.576109] AMD-Vi: Found IOMMU at 0000:00:00.2 cap 0x40
[    7.576113] AMD-Vi: Found IOMMU at 0000:20:00.2 cap 0x40
[    7.576117] AMD-Vi: Found IOMMU at 0000:40:00.2 cap 0x40
[    7.576120] AMD-Vi: Found IOMMU at 0000:60:00.2 cap 0x40
[    7.579261] perf/amd_iommu: Detected AMD IOMMU #0 (2 banks, 4 counters/bank).
[    7.579269] perf/amd_iommu: Detected AMD IOMMU #1 (2 banks, 4 counters/bank).
[    7.579277] perf/amd_iommu: Detected AMD IOMMU #2 (2 banks, 4 counters/bank).
[    7.579284] perf/amd_iommu: Detected AMD IOMMU #3 (2 banks, 4 counters/bank).
[    7.723104] AMD-Vi: AMD IOMMUv2 driver by Joerg Roedel <jroedel@suse.de>
VFIO and VFIO-PCI
If you have two identical graphic cards, the setup is more complicated, as you don't have unique device IDs.
VFIO prevents the loading of the regular GPU driver (amdgpu in our case) and allows the direct device access from the userspace. Make sure you also pass-through the HDMI Audio device of your graphic card.
First take a look at the IOMMU groups and get the device IDs for the GPU you want to pass-through:
# for d in /sys/kernel/iommu_groups/*/devices/*; do n=${d#*/iommu_groups/*}; n=${n%%/*}; printf 'IOMMU Group %s ' "$n"; lspci -nns "${d##*/}"; done;
...
IOMMU Group 22 0c:00.0 VGA compatible controller [0300]: Advanced Micro Devices, Inc. [AMD/ATI] Vega 10 XL/XT [Radeon RX Vega 56/64] [1002:687f] (rev c1)
IOMMU Group 23 0c:00.1 Audio device [0403]: Advanced Micro Devices, Inc. [AMD/ATI] Vega 10 HDMI Audio [Radeon Vega 56/64] [1002:aaf8]
....
IOMMU Group 56 42:00.0 VGA compatible controller [0300]: Advanced Micro Devices, Inc. [AMD/ATI] Ellesmere [Radeon RX 470/480/570/570X/580/580X/590] [1002:67df] (rev e7)
IOMMU Group 56 42:00.1 Audio device [0403]: Advanced Micro Devices, Inc. [AMD/ATI] Ellesmere HDMI Audio [Radeon RX 470/480 / 570/580/590] [1002:aaf0]
....
On AMD ThreadRippers IOMMU groups should not be an issue, every PCI-Express device has it's own group, but you should still check for if there any other devices in the GPU group. If there are (except PCI-E controllers, you just pass that through too), you need to set up ACS overriding.
As we are going to pass-through the AMD Radeon RX 580, we are going to use the IDs 1002:67df and 1002:aaf0 in our configs.
vfio-pci as module
If you are using vfio-pci as an Linux kernel module, we need to make sure it's loaded before the GPU driver. Create the file /etc/modprobe.d/vfio-pci.conf and add the following content with your GPU IDs:
# Needed in order for vfio-pci gets loaded before the GPU driver (as both GPUs use the same driver)
softdep amdgpu pre: vfio-pci
softdep radeon pre: vfio-pci

# Radeon RX 580
options vfio-pci ids=1002:67df,1002:aaf0
vfio-pci compiled into the kernel
Add vfio-pci.ids=1002:67df,1002:aaf0 to your linux boot parameters (as done above). Now reboot the system and verify with lspci, that the vfio-pci driver is loaded, instead of your GPU driver.
# lspci -s 42:00.0 -v
42:00.0 VGA compatible controller: Advanced Micro Devices, Inc. [AMD/ATI] Ellesmere [Radeon RX 470/480/570/570X/580/580X/590] (rev e7) (prog-if 00 [VGA controller])
...
Kernel driver in use: vfio-pci
Please note: AMD Radeon Vega 56 / 64 graphic cards (and some others) have reset issues after you power down the virtual machine. You need to restart your whole system in order to make it work again. There are some workarounds¹ ², which may work for you.
Needed Packages / Installation
We are going to use libvirt and the Virtual Machine Manager as graphical application. Make sure you have QEMU version 3.1 or later, as some improvements and fixes for AMD Ryzen and ThreadRipper were added in this release. For this guide we are going to use the following (Gentoo) software versions:
- libvirt 5.1.0 (USE: libvirtd macvtap numa pcap qemu virt-network)
- virt-manager 2.0.0
- numactl 2.0.12
- qemu 3.1.0 (USE: alsa fdt numa gtk pulseaudio qemu_softmmu_targets_x86_64 qemu_user_targets_x86_64 usb vhost-net spice (for looking-glass))
- edk2-ovmf p20180211 (just ovmf on Arch Linux)
Preparing your user
You need to add your user to the libvirt group (if you want to use qemu directly, also add the user to the qemu group):
# groupadd libvirt
# usermod -a -G libvirt qemu kvm <username>
Make sure your user is also part of the video, audio, plugdev and usb group in order to manage the hardware. Restart your window manager (or use newgrp) for the changes to apply and verify your groups with id. Also check /etc/libvirt/libvirtd.confand make sure unix_sock_group is set to libvirt and the unix_sock_rw_perms are set to 0770.
Now we are ready to setup our virtual machine.
Setting up the Virtual Machine
In this tutorial we are going to create an 8 core (4 cores + 2 Threads) machine with 16GB of Ram and 300 GB of SSD storage, you can adjust these settings to any value you want.
On the AMD ThreadRipper 2970WX you have four numa nodes with 12 cores (6 2 Threads), on an ThreadRipper 2950X you have two, with 16 cores (8 2) each and on an ThreadRipper 2990WX you have four with 16 cores (8 * 2) each. As we are going to adjust our CPU pinning to match the numa nodes of the GPU, make sure your CPU count matches.
Download the Windows 10 October 2018 ISO file (x86_64) from the Microsoft homepage and enable / start the libvirt service with systemctl enable libvirt && systemctl start libvirt.
Please note: Before starting the machine, we need to do some adjustments with virsh.
We can use the dialog wizard to create the basic machine.
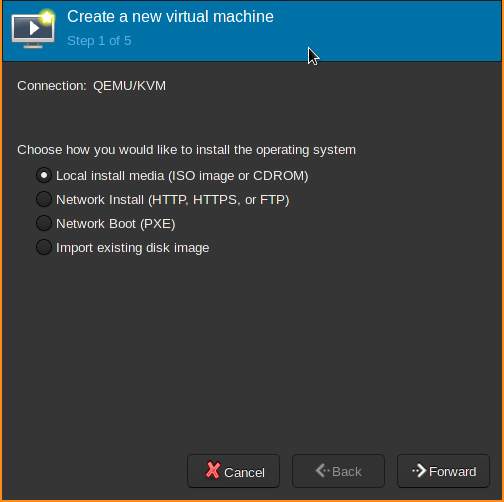
In the first step we choose local installation media to match our iso file.
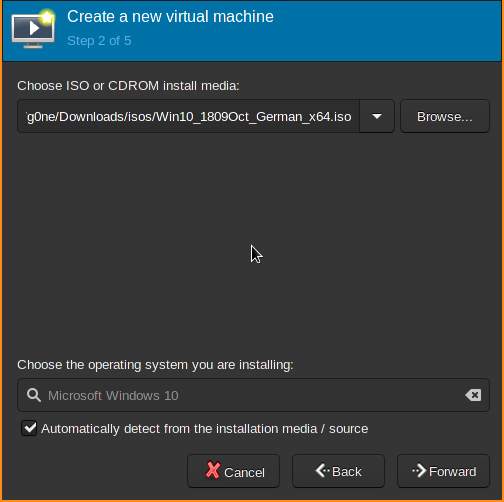
Next choose the Windows 10 iso file. The Operating system should be detected automatically.

We choose 16GB memory and keep the 2 default CPUs (we need to change the topology manually with virsh anyways).
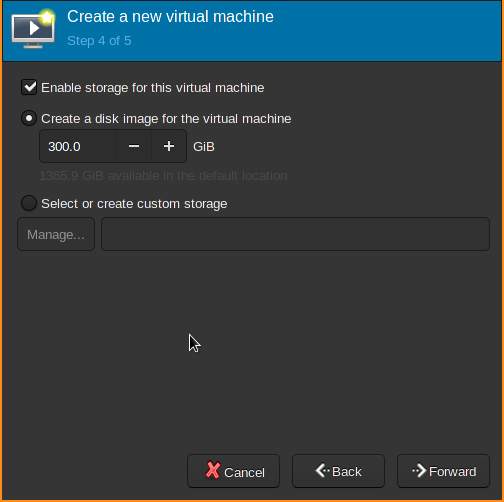
Next we create a disk image for storage. As an alternative you can skip this and passthrough an whole SSD from your host, which brings some performance benefits.
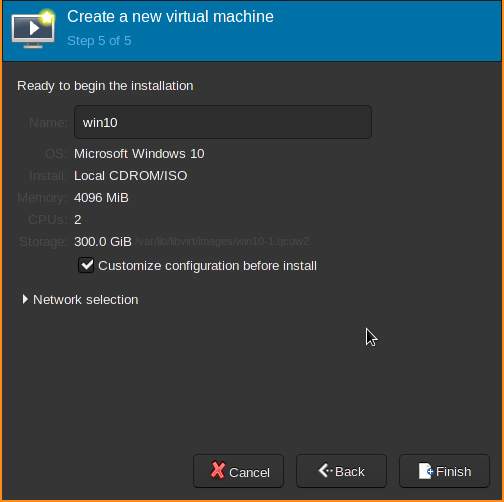
As last step, make sure to check "Customize configuration before installation" and click on finish.
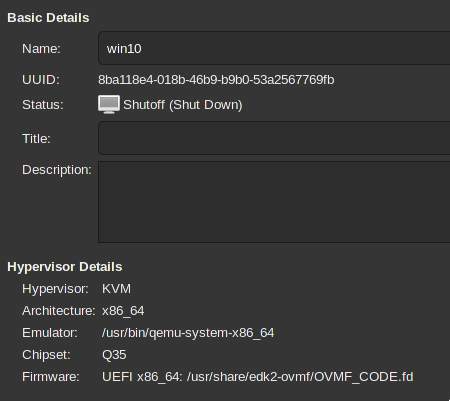
Open (don't start) the virtual machine) and make sure Q35 as chipset is selected (440FX is working too, but Q35 is newer and supports pci express) and switch from Bios to UEFI firmware (edk2-ovmf).
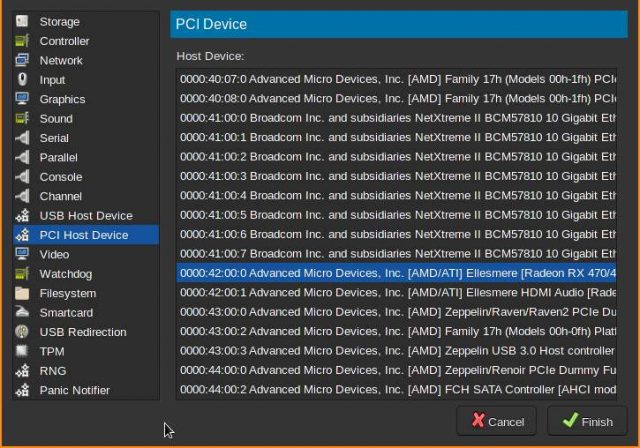
You can also add your GPU to the machine, by clicking "Add Hardware" in the left, choose PCI host device and select the GPU and HDMI Audio device.
Next step is closing the virtual machine and using the libvirt editing tool virsh.
If you are using an Nvidia graphics card, you need to hide the hypervisor for the Nvidia installer by adding
<vendor_id state='on' value='whatever'/>to the hyperv section and<hidden state='on'/>in the kvm section or patch the drivers.
In order to achieve the best performance, we should active cpu pinning and numatune. But first we need to find out to which numa node our graphics card is connected. Luckily there is a great tool, called lstopo for that (hwloc package).
# lstop -lThis should give you a nice graphical overview of your system topology and available numa blocks.
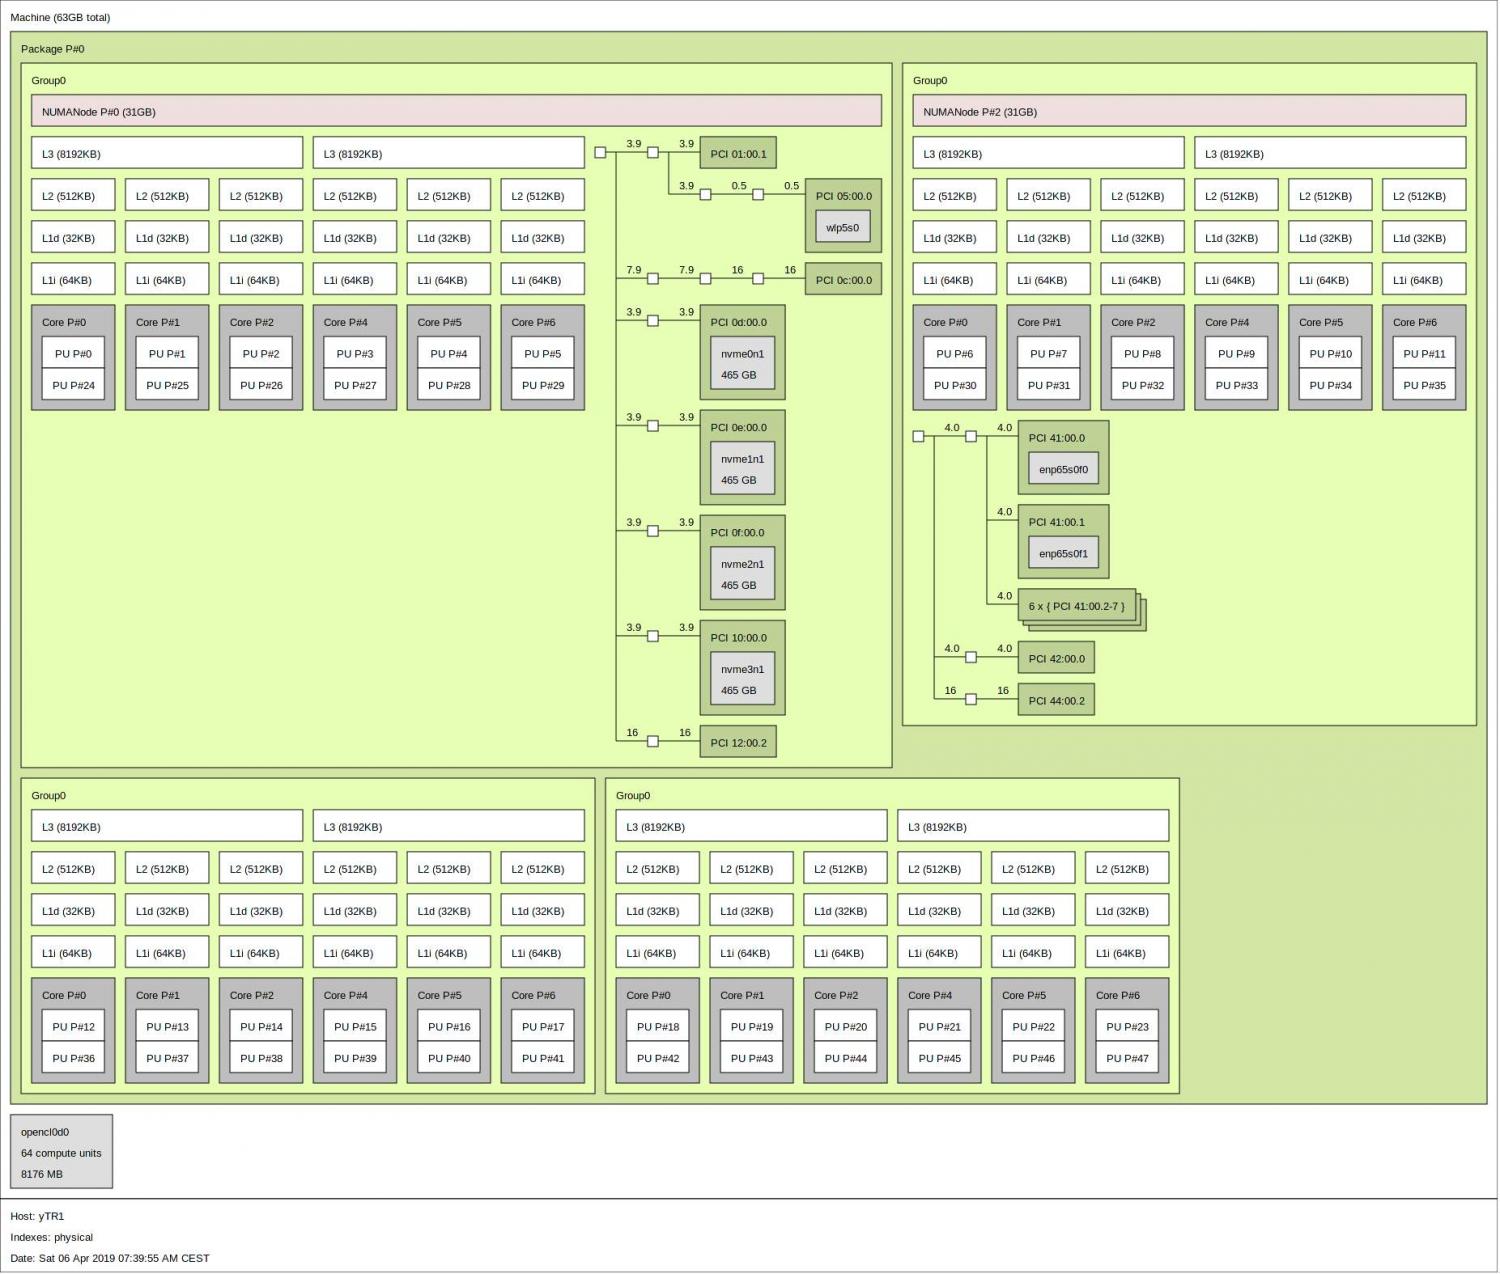
As you can see, the Radeon RX 580 (42:00.0) is connected to the second numa node on the ThreadRipper 2970WX, with the cores 6 to 11 and 30 to 35. You can also use numactl -H to confirm the node id of the CPU cores.
Let's adjust the virtual machine to reflect this, by calling virsh edit win10 (win10 is the name of the virtual machine). In the virsh editor (respects the $EDITOR variable) we modify the vcpu entry and add an cpu- and numatune section after it:
<vcpu placement='static' cpuset='6-9,30-34'>8</vcpu>
<cputune>
    <vcpupin vcpu='0' cpuset='6'/>
    <vcpupin vcpu='1' cpuset='30'/>
    <vcpupin vcpu='2' cpuset='7'/>
    <vcpupin vcpu='3' cpuset='31'/>
    <vcpupin vcpu='4' cpuset='8'/>
    <vcpupin vcpu='5' cpuset='32'/>
    <vcpupin vcpu='6' cpuset='9'/>
    <vcpupin vcpu='7' cpuset='33'/>
    <emulatorpin cpuset='6-9,30-33'/>
</cputune>
<numatune>
    <memory mode='strict' nodeset='2'/>
</numatune>
Make sure to adjust these values to match your AMD ThreadRipper model numa layout.
Next we modify the CPU section of the virtual machine.
<cpu mode='host-passthrough' check='none'>
   <topology sockets='1' cores='4' threads='2'/>
   <feature policy='require' name='topoext'/>
   <numa>
      <cell id='0' cpus='0-7' memory='16777216' unit='KiB'/>
    </numa>
</cpu>
You can download the complete config here
If you want to use more cores than there are on one numa node, you need to adjust the numa entry with multiple cells for the different CPUs. In the numatune section above, you can also set the mode of the memory nodes to "strict" for further optimizations.
Now we are ready to start the virtual machine, install Windows 10 and do some testing. Make sure you have an display attached to the passed through GPU and passthrough an USB Keyboard and mouse too.
You can use looking-glass, after the Windows 10 installation, to use the machine without an attached physical monitor, keyboard or mouse.
The Windows 10 installation is straigth forward, make sure you install the recent graphic card driver and download the (WHQL signed) qemu drivers (for example from Fedora).
I am going to add some benchmark results in the next days (also comparing CPU pinning and numatune). If you have any questions feel free to drop a comment below.